A nice house with a well-cut lawn, numerous fruit trees, and exclusive garden figures is what every homeowner dreams about. If you can take care of your house and lawn at little cost, you should be ready to spend a considerable sum of money if you strive to buy a fantastic cement sculpture for your garden or yard. However, if your budget cannot handle such purchases, you may consider creating a perfect concrete garden statue on your own. Well, the process will take some of your time and effort, but the result will surely be worth it.
Are you excited about an opportunity to get the desired item easily, without side assistance? Keep reading this article to get important recommendations and helpful tips on how to make concrete sculptures.
Cement or Concrete: What to Use for DIY Sculpture?
This is one of the most common questions inexperienced masters ask. In fact, these are completely different items, which are still interrelated. Before you immerse yourself in the process of sculpture creation, you need to acknowledge that concrete is durable and versatile as long as you know how to work with it. Additionally, it is quite accessible and affordable, as you can buy the needed raw material in any building supply store.
What does it take to get high-quality concrete? How can one use it for garden figures and professional concrete sculptures? Although a considerable number of people use the words “concrete” and “cement” interchangeably, they are not the same. Cement is a powdered substance that is one of the most important components of the final products called concrete.
As you may understand, concrete is a mixture of cement, aggregate, and water that are used for making DIY concrete sculptures and other items. The material can be used in numerous forms, depending on the reason you need it. Liquid and semi-liquid forms are the ones you should use to simplify the process and enjoy the results.

How to Make Concrete Sculptures: Top 5 Steps to a Perfect, Long-Lasting Concrete Sculpture
Even if you have never had experience working with sculpturing and have no idea as to how to make concrete sculptures, there is no reason to give it up. Your burning desire to prosper and our detailed guide are the only factors that will predetermine your success.
Basically, the process of concrete statue creation may vary, depending on numerous factors. Check out different methods and techniques you may choose from and relish a unique chance to approach your goal.
#1. Create a Maquette
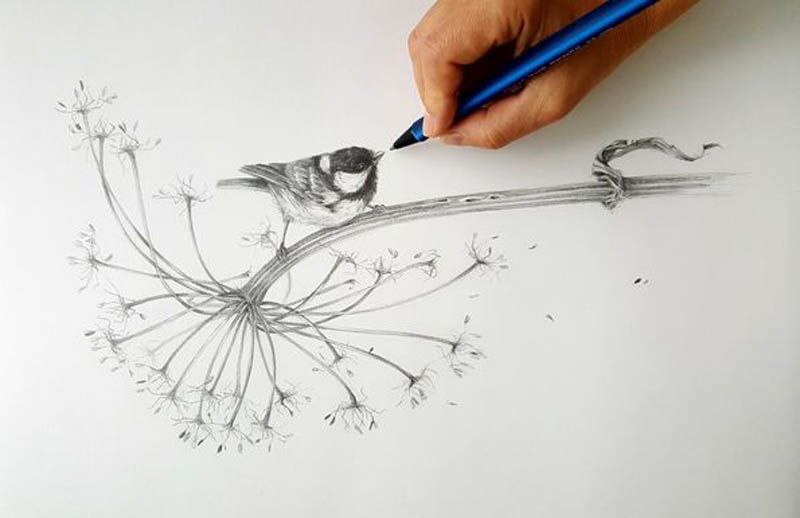
Planning is one of the most crucial points that is halfway to the excellent result. Browse the Internet and find a sketch of the statue you want to create. Or draw it yourself. Once you have it visualized, you can proceed to the next step that is choosing the method you will use to create a concrete sculpture. Keep in mind that you need to start with simpler forms, especially when it comes to your first experience. When you get the basics, you can move to the next level.
#2. Make a Sculpture
There are different materials you can use to create perfect garden statues. Concrete is, undeniably, one of them. Different methods and techniques may be used to craft concrete statues worth attention and appreciation. Each one of them has its specifications and peculiarities that should be taken into account beforehand:
1. Casting concrete.
This is the simplest and the fastest way to create a nice-looking sculpture for your yard. Start with the mold that can be made from latex, aluminum, styrofoam, or plaster. Alternatively, you can purchase one in the local hardware store. Coat the inner surface of the mold with a special substance to make sure the sculpture will be easy to take off the mold.
When the mold is ready, you may start casting cement and combining it with other ingredients necessary for high-quality and durable concrete. Mix them until you get a thick substance that holds the form. Keep in mind that it may be more comfortable to work with liquid concrete, but its quality and durability are questionable.
The moment you are done with the previous processes, you can proceed directly to pouring the concrete into the mold. It is an exceptionally important and responsible stage that requires patience and alertness. Pour cement slowly until the mold is full. Then, use a metal trowel to make the top of the statue smooth. Let the form sit for multiple days before you remove the mold.
2. Carving concrete.
The first steps you will have to make here are the same as when you want to cast concrete. However, the final stages are comparatively much more elaborate and require even more work.
First of all, make sure you have all the necessary materials. Go to the local store and get scrapers, knives, and other carving tools that will help you achieve the desired result.
Next, you need to mix cement with other components to get high-quality concrete. Pour the product into a special mold and let it dry a bit. Do not let it cure long because you will lose a chance to carve the sculpture. You need to work fast to complete the work before the concrete dries. Additionally, make sure you start with the top and proceed to the bottom. Let it cure after the creative part is accomplished.
3. Using mesh.
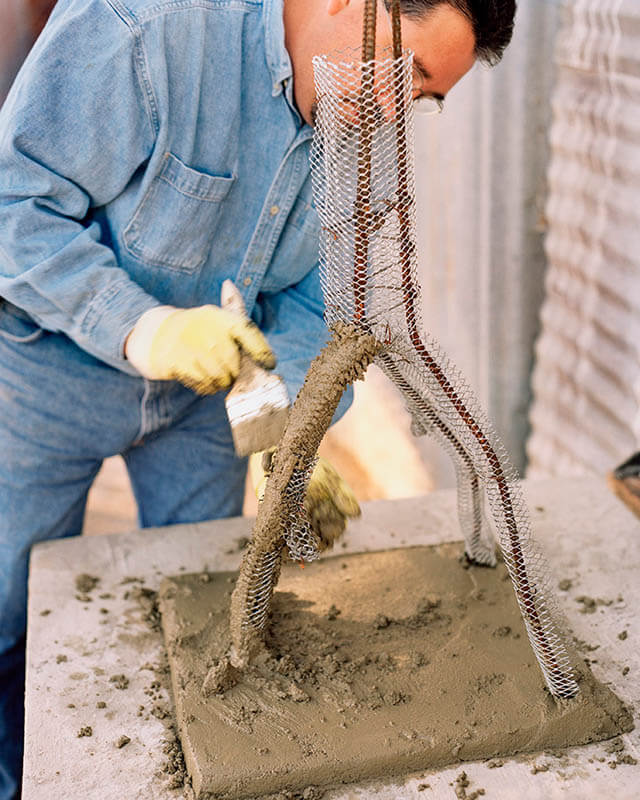
If compared to the previously described methods, this one is the most challenging and time-consuming. Apart from the mold, cement, and a basic set of tools, you will have to get mesh armature that will serve as the framework for your statue. Once you have purchased everything, you are ready to get started. Use wire cutters to get the desired shape from the metal mesh.
Now you have a skeleton that will hold wet concrete right until it dries. If you occasionally fail to get the necessary shape simply from the mesh you have, you can wrap the material around something hard to simplify your task. Mix the concrete and apply it to the mesh. Start with a thin layer, adding extra ones till the moment you get the sculpture you want. Leave your masterpiece to cure for a week or so.

#3. Grind and Polish
Finally, your concrete garden ornaments are ready, and you can move on to the next stage. You will not have to cast concrete, or cut mesh, or construct the mold. Instead, you need to focus on ways to get rid of existing imperfections. In fact, this stage may be optional and will depend mainly on the artistic vision and preferences of the sculptor. If you want your cement art to look shabby and sketchy, you can leave the sculpture as it is. However, if you want to receive a flawless product, you will have to continue your work. There are several ways to get smooth, soft, and well-shaped concrete ornaments:
- Grinding. Different tools can be used to eliminate coarse roughness from concrete statues. Grinding is one of the most beneficial techniques that allow getting a perfect surface without much effort. To apply this method, you need to wait until the sculpture hardens but is still not fully cured. Get a rub brick with a handle to knock off large coarse areas. Then, use rasps and rotary items to eliminate different types of coarseness and obtain an excellent surface.
- Sanding. This is a perfect alternative to the above-mentioned process. You may sand the statue with dry or wet sandpaper, as well as an oscillating grinder. Additionally, the process may be accomplished with rotary tools suited for concrete. Do not press down hard so that you do not damage the sculpture during sanding, but still let the tool do the work.
- Slurry. This method is applicable for statues that have minor imperfections and small holes. You need to combine cement with water to get a runny mix. Then, rub it to your statue and let it dry for half an hour. Wipe the sculpture with a damp sponge and smooth with a sanding item.
- Polishing. If it is not the first time you sculpt with concrete, you may skip the above-mentioned points and proceed right to polishing. Start with 200-grit sandpaper and finish with 400-grit. For extra polishing, you can rub the smooth statue with dry talc. Let it cure for a while before you apply a sealer and wax the ornament. Beeswax and carnauba are the most popular products sculptors use for waxing.
#4. Refinish
A perfect DIY statue may serve you for many years. However, over time, it may require maintenance as cement may tarnish. Fortunately, you will not have to start carving concrete, sanding, and polishing it again. Instead, you may breathe new life into the sculpture, renovating and refinishing it. Follow the guidelines and get the desired result:
- Use a coarse plastic brush to scrub the statue. Soak it in a trisodium phosphate cleanser and rinse the concrete sculpture with water. Leave it for 3-4 hours to dry.
- Take a nylon brush to cast the cement sculpture with an acrylic latex primer. Let it dry.
- Paint your masterpiece with enduring epoxy paint to prolong the life of the refinished sculpture.
#5. Fix the Statue
Although concrete is quite a reliable product that is likely to last long, it may get cracked or broken. If you appreciate the sculpture in your yard or garden too much to get rid of it, you can always make an effort to fix it. The task is quite complicated, but the challenge is real. Take your time to polish the broken area and apply numerous layers of concrete. Polish the whole statue and wax/polish it again.


